Create a New Asset
To create a new asset, the admin must find the desired location in the Asset Tree. The Asset Tree operates like a system of folders where parent assets can have child assets, and those child assets can have their own child assets, etc. Each parent asset level within the Manage Inventory Asset Tree has a [Create New Asset] option, which allows the admin to create a new asset within that parent asset.

For a large Asset Tree, the filter controls can be used to find the desired location for the new asset. The Filter dropdown allows the admin to select "Asset Code," "Asset Name," or "Asset Type," and then type the information into the textbox. Once one selection is made from the dropdown, additional filters can be added using the And/Or dropdown that appears. Once ready, click the Filter button in the top right corner of the screen to filter the Asset Tree.
Once the desired location for the new asset is found in the Asset Tree, select that location's [Create New Asset] option to begin the asset creation:

Asset Creation Controls
- Asset Name – The Asset Name textbox is the name of the asset and one of the main identifiers for it in the Asset Tree and throughout the rest of AssetWise Inspections. An asset's name is recommended to be unique from all other assets' names.
- Asset Code – The Asset Code textbox is another identifier for the asset. It is very important that an asset's asset code is completely unique, that way it can be easily identified if it has the same asset name as another asset.
- Parent Asset – The Parent Asset textbox will automatically be populated with the parent asset that [Create New Asset] was selected from, but the textbox can be edited at any time to change the parent asset.
- Asset ID – The Asset ID textbox will automatically be populated with the asset ID once the asset is created. This is Bentley internal information for support purposes.
- Asset GUID – The Asset GUID textbox will automatically be populated with the asset GUID once the asset is created. This is Bentley internal information for support purposes.
- Asset Order – The Asset Order textbox determines where the asset being created will appear when the parent asset is expanded in the Asset Tree. The Asset Tree will display assets alphabetically by default, but entering a value into the Asset Order textbox (starting with "0" as the first asset in the list) can change that order. All child assets that are not given an order number will still appear in alphabetical order under the parent asset.
- Asset Type – The Asset Type dropdown allows the admin to determine what type of asset is being created. The available options are configurable in the Manage Asset and Report Settings feature located in the Site Configuration branch of the Administration module, but some examples might be: bridge, culvert, sign, etc.
- Default Report Type – The Default Report Type dropdown allows the admin to determine what report type will be pre-selected for the asset being created when a new inspection report is opened. Other selections can still be made for the inspection report depending on the available report types.
- Asset Status – The Asset Status dropdown allows the admin to determine the status of the asset being created/edited. The asset statuses are configured in the Site Configuration tools, but in most cases an agency will at least have a status for "In-Service" and "Archived" assets. Newly created assets will typically have an "In-Service" status to indicate that they are active assets that can have reports created and can be edited. "Archived" assets are set to read-only and can only be found on the Manage Inventory and Archived Assets pages.
- Sync Asset with BrM – Checking the Sync Asset with BrM checkbox indicates that the asset will be integrated with BrM sync. This will only be available if your site is configured to be integrated with BrM sync.
- Create Asset in ProjectWise – Checking the Create Asset in ProjectWise checkbox indicates that the new asset will be created in ProjectWise. The Select Parent Project from ProjectWisebutton will only be available when a new asset is added. This will give you the ability to associate the asset with a project in ProjectWise. If the asset already exists, the Manage Inventory screen will show if the asset is mapped to a project in ProjectWise and what the project name is in the ProjectWise Project Name field. These fields will only be available if your site is configured to be integrated with ProjectWise.
- Asset FHWA Submittal – The Asset FHWA Submittal dropdown indicates that the asset is required to have its NBI/NTI information submitted to the FHWA, and therefore the asset will be included in the NBI/NTI tape creation. Options include Not required, National Bridge, or National Tunnel.
- This Asset Can Contain
Other Assets – Checking the Can Contain Other Assets checkbox indicates that
the asset can be a parent asset and have child assets underneath it in the
Asset Tree. Once checked, a new dropdown will appear underneath the Default
Report Type dropdown:
- The Default Child Report Type dropdown determines what the child assets' report types will default to upon creation. This setting is useful when a large number of child assets with the same default report type need to be created.
- However, the default report type can be changed when editing each individual child asset.
- Summary Report – The Summary Report checkbox is tied to the Can Contain Other Assets checkbox and indicates that a summary report can be created for the asset. The summary report is the parent asset's report that provides information on each of the parent's child assets.

Saving the Asset:

- The Copy Asset button is used to make a copy of the currently selected asset. This can be very useful if the admin wants to create several assets with the same settings and then rename them.
- The Save button saves the new asset, places it in the Asset Tree, and remains on that asset's page.
- The Save and Create More button saves the new asset, places it in the Asset Tree, and resets the creation controls to allow for a new asset to be created.
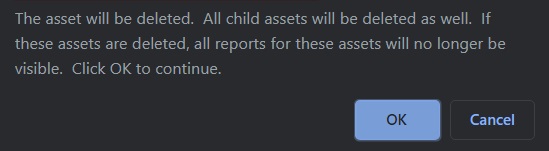
- The Delete button deletes the selected asset as well as any of its child assets. The following message will appear to confirm deletion: